

We’ve all been there. You’ve just finished a 10-minute edit, and the client sends a "quick note": “Can we change the font from Montserrat to Roboto?" Also, I misspelled the brand name in three different places.”
Your heart sinks. In the old days, this meant clicking every single clip on your timeline, opening the Essential Graphics panel, and manually changing settings one by one. It’s the ultimate workflow killer—a tedious, soul-sucking nightmare that keeps you in the chair long after you should have exported.
But you don’t have to edit like it’s 2015. Here is how to master bulk text editing in Premiere Pro.
Method 1: The Essential Graphics Panel
For standard titles and lower thirds, the Essential Graphics Panel (EGP) is your command center. Instead of touching every clip, use Master Styles to create a "source of truth" for your look.
Using Master Styles to Sync Fonts and Colors
Once you have a title looking exactly how you want, look for the Styles dropdown in the EGP. By creating a New Text Style, you can save that specific font, size, and color configuration.
- The Magic: If you apply this style to 50 clips and later decide the red is "too red," you simply update the style on one clip and click the "Push to Project" arrow. Every single clip linked to that style will update instantly.
Timeline vs. Graphics Panel Selection
A common mistake is trying to edit text by clicking clips on the timeline. Instead:
- Highlight all your graphic clips on the Timeline.
- Look at the Essential Graphics > Edit tab.
- You can now change the font or tracking for every selected layer at once, even without a Master Style.
Method 2: The Text Window (Captions & Transcripts)
If you are dealing with subtitles or recurring names, the Text Window (Window > Text) is your best friend.
Search and Replace: The Spelling Savior
Stop hunting through the timeline for that one typo. In the Transcript or Captions tab:
- Click the Magnifying Glass icon.
- Type the misspelled word.
- Type the correction and hit Replace All. It works just like a Word document, fixing every instance across your entire sequence in seconds.
Bulk-Changing Subtitle Aesthetics
In the Captions tab, you don't need to select every caption block. Simply highlight one, change the style in the Essential Graphics panel, and ensure the Track Style is set. This forces every caption on that specific subtitle track to fall in line with your new design.
The "FireCut AI" Shortcut: Why Manual is Still Too Slow
Even with these built-in tools, manually managing layers is a drag. You still have to cut the gaps, align the timing, and ensure nothing overlaps. This is where AI-driven tools like FireCut AI change the game.
One-Click Captions
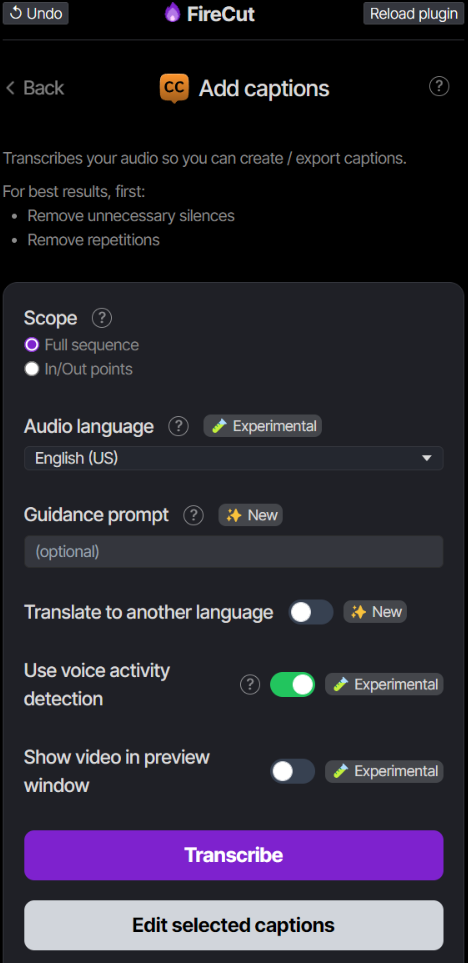
While Premiere’s "Auto-Transcribe" is good, FireCut AI takes it a step further by generating and styling hundreds of captions in more than 50 languages in just one click. It handles the heavy lifting of "chunking" the text into readable bites and placing them perfectly on the timeline.
If you have to edit anything later, you can simply select the captions and click on “Edit selected captions” to change the font, color, or style, and changes are made in seconds!
The beauty of FireCut AI lies in its AI-driven logic. You don't just "search and replace"; you set a visual "Vibe" or "preset," and the tool applies that logic across the entire edit. If you want "Pop-on" animations for every word, you don't have to keyframe a single thing.
Furthermore, FireCut AI also has other amazing automated features like silence cutting, B-rolls, podcast editing, and much more! So you can use the plugin to speed up most tasks in your daily editing workflow.
Conclusion
Your value as an editor isn't found in how fast you can click a dropdown menu 50 times. It’s found in your pacing, your storytelling, and your creative vision.
With advanced technology like FireCut AI, you can stop relying on manual editing and get back to what actually matters: the creativity. Keep your eyes on the story, and let the software handle the typography and the cuts. Start your free trial today to step up your editing game!